
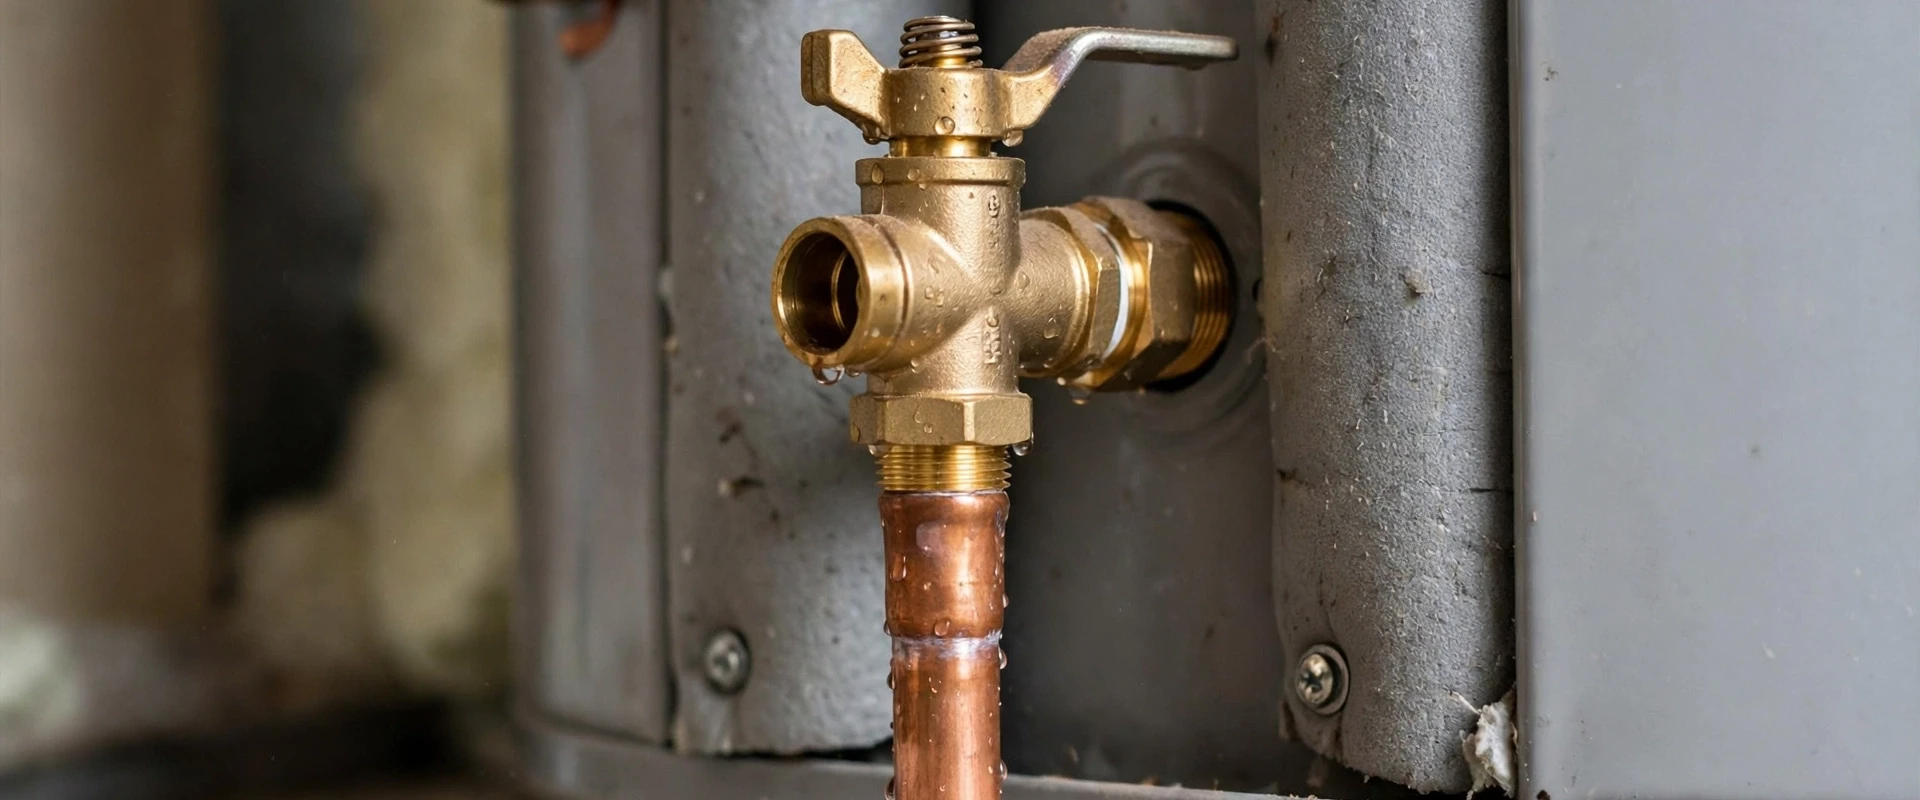
What the T and P relief valve actually does
Every tank water heater carries a temperature and pressure relief valve, usually called the T and P valve. It sits on the top or upper side of the tank, with a short brass body, a test lever and a threaded outlet that connects to a discharge pipe. Its only job is to open when the water inside gets too hot or the pressure climbs past a set limit.
Why that matters comes down to physics. Heated water expands, and steam takes up far more room than liquid. If a thermostat fails and keeps the burner or element running, the tank can heat past boiling and build pressure that a steel shell was never meant to hold. The valve opens first, dumps hot water down the discharge pipe and keeps the tank intact.
The valve is a spring-loaded part, not a permanent one. Mineral deposits, corrosion and years of heat cycling can leave it stuck shut or leaking by. A relief valve that cannot open is the dangerous failure, because the water heater then has no backup if the thermostat fails.
Signs the relief valve is bad
Most bad valves announce themselves. Look for water dripping from the valve body or the end of the discharge pipe. Watch for white or green crust around the outlet, or a test lever that is frozen in place. A valve that was installed with the water heater and has never been touched is more likely to be stuck than one that gets an occasional test.
Constant drip from the discharge pipe
The seat may be worn or scaled, or pressure in the system may be too high. Both need a closer look.
Running or hissing discharge
The valve is opening. Treat this as an alarm until someone finds out whether heat or pressure caused it.
Corrosion or crust at the valve
Water has been weeping from the threads or the seat for some time. The valve is a candidate for replacement.
Stuck or seized lever
If the lever will not move at all, the valve probably cannot open when it needs to.
Valve older than the tank warranty
Relief valves wear out. Many plumbers replace the valve when they replace or service the heater.
Smell and sound help too. A rumbling or popping tank means sediment is trapping water against the bottom and boiling it in pockets, and a relief valve that opens now and then in that case is responding to real conditions. That points to the tank, not just the valve.
Why a dripping valve is not always a bad valve
A valve that drips only when the heater is running, and stops when the tank cools, is often reacting to thermal expansion. When water heats, it expands by a small but real amount. In an open system, that extra volume pushes back into the city main. In a closed system, with a backflow preventer or a pressure reducing valve on the incoming line, the water has nowhere to go and the pressure inside the tank spikes.
The relief valve is then doing exactly what it was built to do, which is bleed off the extra pressure. Replacing the valve does not cure the cause, and the new one will start dripping within days. The usual fix is a thermal expansion tank on the cold supply, a small pressurized tank with an air cushion that absorbs the extra volume.
A plumber can tell the difference with a pressure gauge on a hose bib. If the static pressure sits high, or climbs when the heater cycles, the system needs an expansion tank or a pressure reducing valve adjustment. If pressure stays normal and the valve still drips, the valve itself is worn and should be replaced.
How to test the lever safely
Testing once a year is the common advice, and it is reasonable if the valve is in good shape. But the water that comes out is hot enough to scald in seconds, so treat the test with respect.
Check the discharge pipe
It should run down to a safe spot, ending a few inches above a floor drain or the ground. Make sure nobody and nothing sits in line with the outlet.
Keep people clear
Children and pets stay out of the room. Wear closed shoes and stand to the side of the valve, never over it.
Lift the lever briefly
Raise it gently and let a small amount of water flow, then release. It should snap back and the flow should stop.
Watch for a drip afterward
A few drops are normal. A steady drip after the test means debris on the seat, and a second quick flush sometimes clears it.
If the lever does not move, or water pours out and will not stop, do not force it and do not cap the pipe. Shut off the power or the gas control, close the cold water supply to the tank and call a licensed plumber.
Replacing a T and P valve step by step
If you are comfortable working with basic tools, hot water and gas or electric power, go through the steps in order. Otherwise call a plumber. Keep in mind that the discharge pipe can carry scalding water, so keep hands, face and bare feet clear of it and its outlet.
First, turn off the power at the breaker for an electric heater, or set the gas control to the pilot or off position for a gas heater. Close the cold water supply to the tank. Open a hot tap somewhere in the house to let air in and relieve pressure, then carefully lift the old valve lever to bleed pressure from the tank.
Next, drain enough water to bring the level below the valve opening. Attach a hose to the drain at the bottom and run it to a floor drain or outside. Let the water cool first, because tank water can stay hot for a long time.
Then remove the discharge pipe, and unscrew the old valve with a pipe wrench or a wrench that fits the valve body. Compare the new valve to the label on the tank. The pressure rating must match the tank's marked working pressure, and the temperature rating and the heater's BTU or wattage capacity must be within what the valve is rated for. Never install a higher-pressure valve to stop a drip.
Thread the new valve in according to its own instructions. Some manufacturers call for thread tape and some for pipe sealant, and a few prohibit one or the other, so read the sheet in the box. Tighten firmly, with the outlet pointing the right way, and do not overtighten brass into the tank fitting.
Finally, reconnect the discharge pipe, refill the tank with a hot tap open until water runs steady, close the tap, check for leaks and restore power or gas. Run the heater through a cycle and watch the valve for a drip.
The discharge pipe matters as much as the valve
A relief valve without a proper discharge pipe is unfinished work. The pipe carries scalding water and steam away from people. It should be the same size as the valve outlet or larger and run downward with no uphill sections. It ends a few inches above a floor drain, an outside spot or a drip pan connection per the manufacturer's instructions and local code.
Do not put threads on the end of the pipe, do not add a valve or a cap, and do not plug the outlet with anything. Threads invite someone to screw on a cap later, and a capped valve is a bomb waiting for a thermostat failure. If the existing pipe is undersized, kinked or capped, the plumber can correct it during the swap.
| What you see | What it usually means | Usual response |
|---|---|---|
| Drips only while the heater heats | Thermal expansion in a closed system | Test pressure, add or recharge an expansion tank |
| Drips all the time at normal pressure | Worn or scaled valve seat | Replace the valve |
| Discharge pipe running hot water steadily | Overheating or very high pressure | Shut off power or gas and water, call a plumber |
| Lever stuck or corroded | Valve cannot open when needed | Replace the valve |
| Discharge pipe capped or threaded | Unsafe installation | Remove the cap and correct the pipe |
When to hire a plumber
Replacing the valve is realistic for a careful homeowner with easy access to a small heater. Call a licensed plumber if the valve will not budge or has crumbled. Call too if the tank leaks at the connection, the heater shows soot or scorch marks, or you suspect the thermostat or gas control has failed. If there is a gas smell, leave the building and call 911 and the gas utility from a safe distance.
Relief valve dripping, hissing or stuck?
Call the 24/7 line. A licensed plumber can test the valve and the pressure, and you hear the price before work starts.
Sometimes the answer is bigger than a valve. If the tank is leaking at the base, covered in sediment or well past ten years old, a new valve will not buy much time. Our repair page covers what can be saved, and the plumber can tell you honestly when a new heater is the sounder spend.
Cibolo relief valve rules: what to know locally
The City of Cibolo enforces the 2021 International Plumbing Code (IPC), according to the City. Under that code, a water heater relief valve needs a proper discharge line, so routing the pipe correctly is part of a compliant installation and not an optional extra. Permit rules vary, so ask the City of Cibolo building department before work that goes beyond a like-for-like valve swap.
Sediment is a real cause of stuck and weeping valves, because grit settles around the seat and keeps it from closing. No hardness figure appears in the water quality reports we have, so we cannot say how fast scale builds in your tank. The practical move is to test your own tap with a simple hardness strip and ask your water utility for its annual water quality report.
Which utility you use is on your bill, since both the City of Cibolo and Green Valley SUD serve addresses in town. We also dispatch for water heater work in nearby Schertz and Converse, and the valve steps are the same.
Questions about relief valve replacement in Cibolo
A single drop now and then is not unusual, but a steady drip is not normal. It usually means thermal expansion, a worn seat or high system pressure, and each has a different fix.
No. A capped relief valve cannot protect the tank, and the water has to go somewhere. Fix the cause of the drip instead. That is the reason the pipe must stay open, run downward and end without threads.
It depends on whether your plumbing is a closed system. If a backflow preventer or pressure reducing valve sits on the supply line, expansion has nowhere to go. A plumber can read the pressure and tell you, and the expansion tank is often installed with a new unit through water heater installation.
Only if it is the right size, runs downward and is in good condition. Corroded, kinked or capped pipes should be replaced during the swap.
Possibly, through sediment and scale, but no hardness number appears in the 2025 reports we have seen. Test your tap and ask your utility for its water quality report. Flushing the tank on a regular schedule helps in any case.