
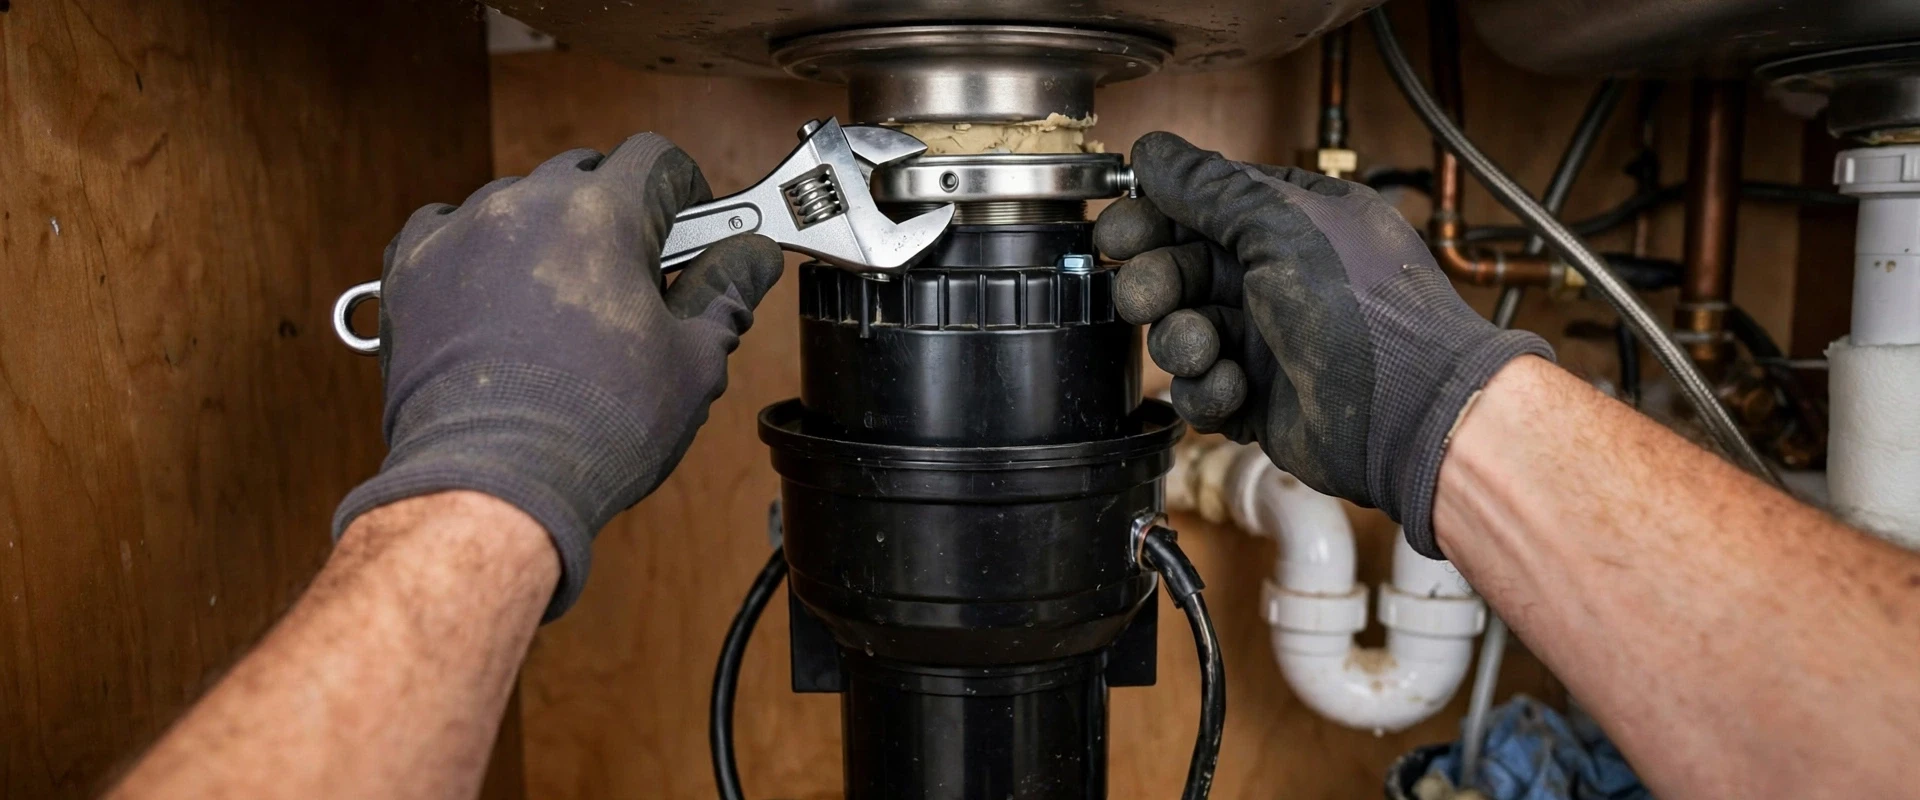
Replacement or first-time install?
The difficulty of the job depends mostly on what is already under your sink. A replacement reuses the existing mounting flange, drain pipe and power supply, so you are largely swapping one unit for another. A first-time install adds all of that from scratch.
For a replacement, you mainly need the new unit to match the old one in mount type and drain position. Many disposals share a common mounting system, but not all of them. Check the model number on the old unit and compare it against what you buy.
A first-time install is a bigger job. The sink needs a 3.5 inch drain opening for the disposal flange, the drain trap has to be reworked to fit the disposal outlet, and there has to be a power source under the sink. If any of those is missing, the project grows quickly. Adding wiring is the point where many homeowners should bring in an electrician, and re-plumbing the drain is where a plumber earns their fee.
Tools and parts you will need
Most of what you need is common. A few items are specific to disposals and worth buying with the unit.
- Screwdrivers, an adjustable wrench and channel-lock pliers
- A hammer and a flat screwdriver or punch, for the dishwasher plug
- Plumber's putty for the sink flange seal
- A power cord kit, if the new unit does not come with one and your setup uses a plug
- Wire nuts and a voltage tester
- A bucket, rags and a flashlight
- Hose clamps and a dishwasher drain hose if yours needs replacing
Buy the mounting hardware that matches your unit. Some disposals come with a quick-lock mount that twists on, while others use a three-bolt system. Either works, but it should match the one you are installing.
Electrical safety comes first
A disposal has a motor, a drain full of water and a switch. That is a combination where mistakes are dangerous. Never work on one without cutting power first.
Turn off the breaker that feeds the disposal, then test the wires with a voltage tester before touching them. Do not trust a wall switch alone. A switch can be wired on the neutral side or may not control what you think it controls. Verify that the circuit is dead at the wires themselves.
There are two common ways a disposal is powered. A hardwired unit has its cable run into a junction box at the bottom of the unit, connected with wire nuts. A plug-in unit uses a cord kit that connects to an outlet under the sink, often controlled by a wall switch. Either is acceptable if it follows the manufacturer's instructions and local electrical code.
If there is no switch or outlet, if the wiring looks old or damaged, or if the circuit is shared in a way you do not understand, stop. Running a new circuit is electrician's work. The City of Cibolo enforces the 2023 National Electrical Code, and a licensed electrician will know what applies to your kitchen.
Step by step: mounting the disposal
If you are replacing a unit, start by removing the old one. Cut power, disconnect the wiring, loosen the drain pipe and release the mounting ring. Support the weight, because disposals are heavy. Then clean off the old putty from the sink flange area.
Seat the flange
Roll a rope of plumber's putty and press it under the sink flange, then drop the flange into the sink opening and press it down to form a seal.
Attach the mounting parts
Slip the gasket, backup ring and mounting ring on from below, then snug the screws evenly until the flange is held tight and putty squeezes out.
Wire the unit
With power off, connect the black, white and ground wires to the matching wires in the disposal, or attach the cord kit as instructed.
Hang the disposal
Lift the unit and align it with the mounting ring, then twist or bolt it in place so it hangs level and does not wobble.
Wipe away the squeezed-out putty from the sink once the ring is tight. Do not run the disposal yet. The drain and dishwasher connections come next, and they are where the most common leaks and the best-known mistake live.
The dishwasher knockout plug mistake
Most disposals have a small port on the side for the dishwasher drain hose. On a new unit, that port is capped with a solid plastic plug called a knockout. If your dishwasher drains into the disposal, you must remove that plug before connecting the hose.
Forgetting this step is the classic installation mistake. The dishwasher cannot drain, water backs up into the dishwasher, and the problem often appears days later when someone runs a cycle. To remove it, set a screwdriver against the plug from inside the disposal and tap it with a hammer until it drops into the chamber. Reach in with pliers or a magnet and take the plug out.
Leaving it in the grinder chamber can jam the unit the first time it runs.
Do this before you hang the unit. It is much easier to work from above and below with the disposal in your hands than with it hanging in the cabinet.
Connecting the drain and testing
Attach the discharge elbow to the disposal outlet using its gasket and bolts, then connect it to the trap. The pipe should slope down toward the wall, and the trap should hold water, since the trap blocks sewer gas from entering the house. If you have a double sink, the second basin usually drains into the disposal's outlet through a tailpiece and a tee.
Connect the dishwasher hose to the port, using a clamp. The hose should loop up high under the counter before it drops into the disposal, which helps keep wastewater from flowing backward into the dishwasher. Some codes also call for an air gap, and the 2021 International Plumbing Code (IPC) covers how drains must be vented and protected.
When everything is connected, restore power at the breaker. Fill the sink partway with water, let it drain and watch every connection for drips. Run cold water, switch the disposal on and let it run for a few seconds. Feel along the joints with a dry paper towel, which shows small leaks better than your eyes do. Run the dishwasher briefly and check again.
Leak or noise after install?
Call the 24/7 line. A licensed plumber can find the problem and quote the price before work starts.
Choosing size and type
The horsepower rating matters for how well the unit handles tough waste and for how long it lasts. Smaller units suit a household that cooks lightly. Larger units handle more volume and tougher scraps and tend to run quieter. For a busy kitchen, a mid-range unit is a sensible choice.
| Choice | What it means | Best for |
|---|---|---|
| Continuous feed | Runs while the switch is on, and you feed scraps through the opening | Most households, with quick cleanup |
| Batch feed | Runs only when a stopper lid is in place | Homes with children, or anyone worried about hands in the opening |
| Lower horsepower | Handles soft food waste at a lower noise level | Light cooking and small households |
| Higher horsepower | Grinds tougher scraps with less jamming | Large households and heavy cooking |
A larger motor does not mean you can put anything down it. All disposals grind soft food and small bones, not hard objects.
What can and cannot go in
Keep fibrous items out, such as celery, corn husks and artichoke leaves, since the strings wrap around the grinding parts. Do not put in grease, oil or fat. It cools in the drain and builds up into a coating that catches other waste. Coffee grounds, eggshells, pasta and rice tend to settle in the pipe and cause clogs. Avoid bones from large animals, fruit pits, glass, metal and plastic.
Run cold water before, during and for about 15 seconds after grinding, so waste moves through the trap and into the main drain. A jammed or humming unit that will not turn is a repair question, covered under disposal repair. Never put your hand in the unit. Use tongs for retrieving objects, and make sure the power is off first.
When to call a plumber
Hire a licensed plumber if you are adding a disposal where none existed. That is a new fixture installation with drain rework, not a swap.
Call one too if the drain pipes need to be reworked, if a shutoff valve is corroded or cannot be closed, or if the sink opening is not the right size. Also call if there is any sign of water damage in the cabinet, which should be dealt with before new equipment goes in. If power needs a new circuit, call an electrician as well.
Disposal installs in Cibolo: what to know locally
The City of Cibolo enforces the 2021 International Plumbing Code (IPC), as well as the 2023 National Electrical Code. Permit rules vary, so ask the City of Cibolo building department whether adding a disposal or new wiring needs a permit at your address. A quick call before you start is cheaper than correcting work afterward.
If you hire someone, verify the license. According to the Texas State Board of Plumbing Examiners (TSBPE), plumbing work is done under a Responsible Master Plumber, and RMP license numbers begin with the letter M. Use the TSBPE online license search, confirm a certificate of insurance is on file, and ask that the estimate or invoice show the RMP number and TSBPE contact information. If something seems wrong, the TSBPE enforcement line is (512) 936-5200, extension 65249.
Water comes from the City or GVSUD, and GVSUD adds the sewer charge. Neither changes how the disposal is installed, but a heavy-use disposal puts more solids into the line, so keep grease out of it. The steps in this guide also apply in nearby Schertz and Converse.
Common questions about garbage disposal installs in Cibolo
Permit rules vary, so ask the City of Cibolo building department. They can tell you whether your project, including any new wiring, needs one.
No. Disposals need a proper hardwired connection or a cord kit plugged into an outlet that meets code. Extension cords are not a safe permanent solution.
Check whether the knockout plug in the dishwasher port was removed. If it was not, water cannot pass from the hose into the disposal. Also check that the hose clamp and drain loop are set correctly.
Ask for the Responsible Master Plumber's name and license number, which begins with M, then look it up using the TSBPE online license search. Confirm a certificate of insurance is on file.
Continuous feed is more convenient and common. Batch feed only runs when the lid is in place, which some households prefer for safety. Both grind the same way, so choose based on your habits.